How To Glitter Part Of A Graphic
by Bemymind
©April 2002
Another in a series of good times at Animation High!
LOLOL
For this tutorial you will need to be familiar
with the tutorial:
How To Glitter Your Fonts
Tutorial
http://hometown.aol.com/bemymind/howtoglitter.html
for the purposes of getting your glitter and being able
to set the frames of the glitter to pattern fill in PSP.
i wrote this tutorial using PSP 7.04 and Animation Shop 3
here we go:)
First up, we need a graphic!!
This is the one i choose:

This Graphic Not Made By Me, i'd love to give credit
where credit is due, if you know who, please e-mail me!
Next, we need glitter!
is the one I choose:

Refer to How to glitter your fonts on how to
set your glitter frames up in PSP and do that now.
Once you have your frames ready, minimize
them and we will work on the main graphic first.
Open your graphic
Layers>New Rastar Layer
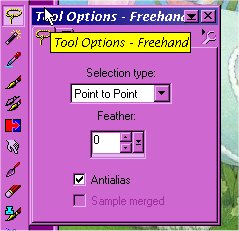
choose your lasso tool and adjust settings to these:
go to View>Zoom In by 5
(trust me, you may want to zoom in more! LOL)
so that you have just the area that you want to
select for glittering.
begin left clicks around the edge of your image:
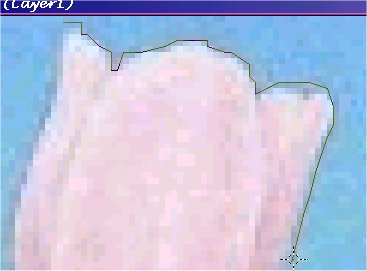
depending on how particular you wish or need to be
go all the way around the area you want. When you
reach your original beginning point, right click and
the area will be surrounded by our favorite marching ants:)
sometimes, you gotta love 'em!
notice in this particular graphic i have some detail
lines in the tulip
that will be important in just a minute! LOL
Go to View>Normal
notice that your area is still marching..LOL
just for safe keeping, cuz i lose stuffes easily...
go to Selections>Save to Disk
name it whatever you like and click save.
this way, when you bring up the exact same graphic
you can choose Selections>Load from Disk
and find that particular selection and open it on the
graphic again and again.
okies... now,
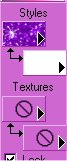
on your color pallete, we want the top to be the pattern
fill
with the first frame image of your glitter.
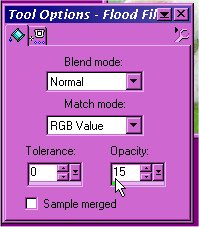
Click on your flood fill tool

now, this is what the tulip looks like if i don't adjust
the floodfill settings:

can you say ewwwwwww???ROFL
for this graphic i want those detail lines to come
through a bit
(told ya it was gonna be important...LOL)
so, using these settings:
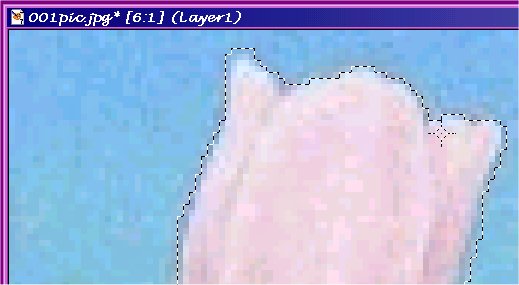
when i click in the selection, it now looks like this:

you can see some definition as to the flowers shapes:)
A= got to Selections>Select None
B= Layers>Merge>Merge Visible
C= on your keyboard Shift+D to duplicate the image.
D=File>Save the copy as image1.psp (in psp format)
E= Close out the copy.
F= back to your original graphic and go to
G= Edit>Command History
when this window pops up...scroll down to the line
that says "Flood Fill" and click ONCE on it to
highlight that line
and choose the button "Undo"

notice on your graphic you are back to the original
selection.
Change the pattern fill to the second frame of your
glitter
and click in the selection again to fill it.
Follow steps A thru G again only name this one
image2.psp
and follow the same steps again with the next frame of
your glitter and
name it image 3.psp
(if you glitter has more frames, as in the other tut,
you will need to do more flood fills
and save them the same way)
Open Animation Shop:)
Click on the Animation Wizard Button
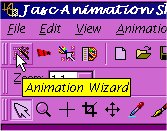
we are going to use the defaults as they are for this one.
Window 1= Same size as the first image frame>Next
2=Transparent>Next
3=Upper left corner of the frame and with the canvas
color>Next
4=Yes, repeat the animation indefinatly and 10>Next
5=Add Image, choose your images you just made, make sure
they are in numerical order top to bottom in the list
window
click open
click Next
6= Finish
File>Save
name your animation, making sure you save in .gif format.
more windows! LOL
Click Next 4 times and finish and you are done!

Bemymind is the author of this tutorial.
any questions, feel free to write me!!
hey, i actually answer! ROFL
bemymind@aol.com
Please respect the copyright.
Please give credit where credit is due:)
Thank You!
|