2nd in a series...or is it the 3rd...
i forgot about about the scripting over the top
one...
so yeah, this one is the third one! LOL
©Bemymind June 9,
2009
Once you have your image set up,
these steps can be scripted and used
in the Scripting 101 scripts for
tagging.
You do not need your image to be flat, it can
be
a transparent background image
(such as one you'd use to create a .gif or .png
image)
For the purpose of this tutorial, i am using a flat
image.
You will need Paint Shop Pro
version 8.10 or above
and an image of your
choice.
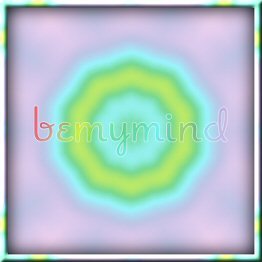
Here is my image i'll be using for
this tutorial:)
Choose your preset shape tool  and set to rectangle
 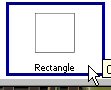 .
.
.With these settings:
Set your background to null and choose a bright contrasting color
for
your foreground 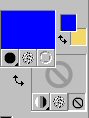 .
.
.Draw out the rectangle where you want your text to
be:
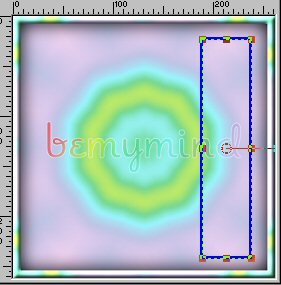
I want my vector box to be centered vertically on my
image, so go to Objects>Align>Vert. Center in
Canvas:
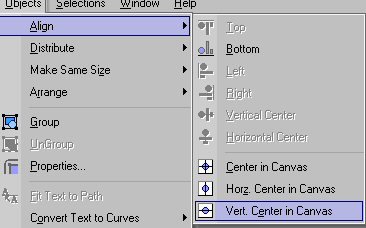
and you will see that it move and now be centered.
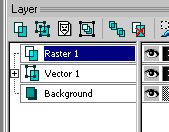
Then go to Layers>New Raster Layer.
Your Layer Pallet should look like this:
 click on that + sign and see this:
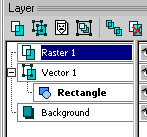 .
.File>Save> and save as a .pspimage, making
sure
you click the options button and choose the version of PSP you are
using.
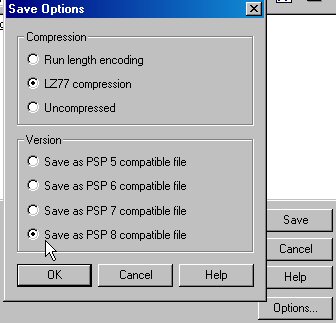
if you don't, it will give you an error message about loosing the
vector information.
Now we are ready to add text!
choose your font and set your foreground and
background
colors to what you'd like:)
NOTE: I'm going to show you two ways,
#1. The text that fits just right.
and
#2. If the text is too long to fit just right.
If you are setting up to record for using the TJP-MakeTags
script
with Scripting 101, your first recording should ONLY ADD THE
TEXT.
Nothing more, no effects or moves, just adding the text
and
save as your first recording.
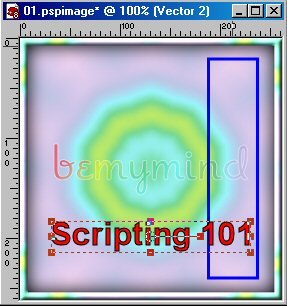
#1. Rotating text that fits just
right:
Choose your text tool and
Click anywhere on your image to get the text
box
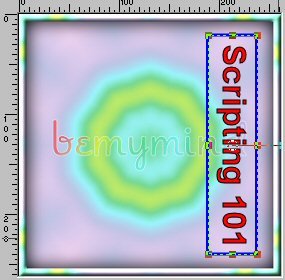
to come up. Type out your text and click ok:
Go up to your tool bar and choose:
Image>Rotate>Free Rotate:

Even though we are doing a 90degree turn,
IF you choose the 'Rotate Right', it turns
everything!
We just want to turn the top layer of text only
So, in the Free Rotate box choose these settings:
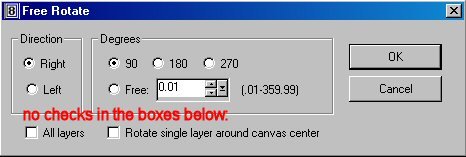
and click ok.
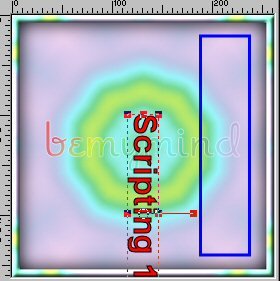
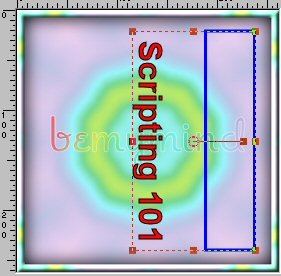
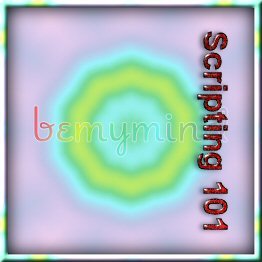
Your copy will rotate, don't worry if it goes off your
image
like mine is below, we are going to fix that:)
take a look at your layer pallet.
In your layer pallet that now looks like this:
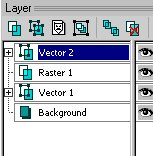
click on the + signs to open up the vector layers like
so:
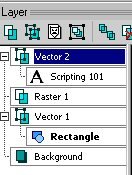
Click on 'Rectangle' to highlight it like so:
The 'Vector 1' actually highlights, but the
word 'Rctangle' becomes bold.
HOLD DOWN YOUR SHIFT KEY ON YOUR KEYBOARD and
right click over the 'A Scripting
101' layer.
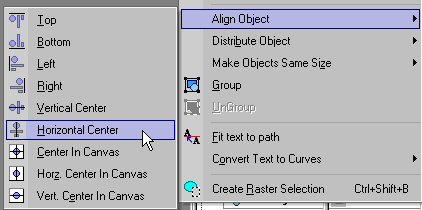
go to Align Object>Vertical Center.
your copy moves to the center of the canvas:
But we aren't done yet!
Then, still holding the shift key down, right click over your text
layer
Still holding down the shift key right
click over your text layer
and choose Align>Horizontal Center:
and voila! your text is where you want it!:)
Go to your layer pallet and
convert your text to raster layer
then delete the vector box
layer.
add whatever effects to your text
and
save as your second recording.
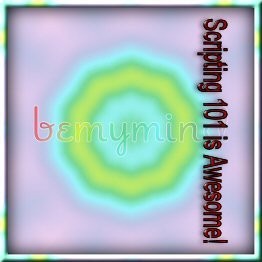
then merge>all
flatten.
(Or merge>visable (if doing a transparent
background image)
and you're
done:)
#2. If the text is too long
to fit just right:
Choose your text tool and
Click anywhere on your image to get the text
box
to come up. Type out your text and click ok:
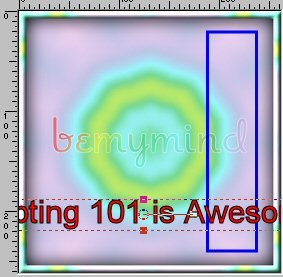
Go up to your tool bar and choose:
Image>Rotate>Free Rotate:

Even though we are doing a 90degree turn,
IF you choose the 'Rotate Right', it turns
everything!
We just want to turn the top layer of text only
So, in the Free Rotate box choose these settings:

and click ok.
Your copy will rotate, don't worry if it goes off your
image
like mine is below, we are going to fix that:)
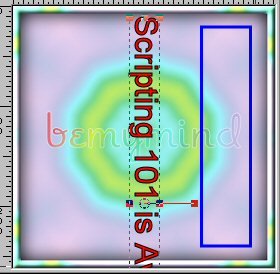
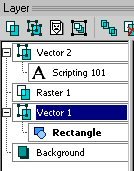
Just like before go to your layer pallet and
Click on 'Rectangle' to highlight it like so:

The 'Vector 1' actually highlights, but the
word 'Rctangle' becomes bold.
HOLD DOWN YOUR SHIFT KEY ON YOUR KEYBOARD and
right click over the 'A Scripting
101' layer.
But this time go to Make Objects the same
size>Vertical.
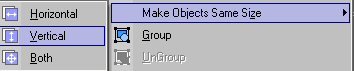
your copy squishes to the length of your vector
box:
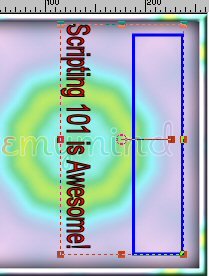
STILL HOLDING DOWN THE SHIFT KEY,
right click over the 'A Scripting
101' layer.
go to Align Object>Vertical Center AND
STILL HOLDING DOWN THE SHIFT KEY,
right click over your text layer
and choose Align>Horizontal Center AND
voila!
it's where it needs to be:)
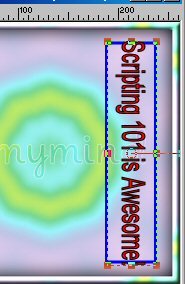
convert your text layer to a rastar layer,
delete the vector box layer.
add any effects to your text and
save as your second recording for long text.
Sometimes i make several 'effects' scripts for the
same
tag, just to get all the possible copy effects that i
want:)
hope this helps
folks!
Bemy:)